


Leveraging Dart Lint Rules for Your Flutter Applications
#17DaysOfFlutter Content Saga Continues


It has been a while since I created a Flutter content that could benefit engineers from different levels. So I thought this should be a nice, conversational blog post about Dart's static analysis tools.
I have been developing Flutter applications for a long time. I just checked, and I created my first content about it almost five years ago! Along the way, I have seen people had questions about why did they have "these weird underlines at some code" or simply why did their code acted unexpectedly.. And many of these problems could be fixed with a simple attention to a setting. Dart's static analysis.
Before we move forward with Flutter/Dart related details, you might be asking, “What is static analysis?”. Well, let me answer that.
What is Static Analysis?
Static analysis allows you to find problems before executing a single line of code. It’s a powerful tool used to prevent bugs and ensure that code conforms to style guidelines.
Conforming style guidelines helps you to keep a level of quality with your code. Also, if you are a beginner, it helps you to get used to a standard that teams all around the world follow.
Static analysis works instantly (well, according to your IDE, it might require a little of a push). It checks out your entire project according to the rules that are defined by you or the project that you are using and lets you know of the ways of fixing them or improving your project.
For example, whenever you have an item that you created causes an obvious error, you see that it is marked with red. It won’t let you compile your application. Whenever you have a warning like “Unused item”, it will show it with a color. It won’t break your app, but still warn you for your own good.
Static Analysis in Flutter Projects
You might wonder, "How does static analysis know about the rules that are provided?". The reason is, they are using a set of rules called lints. There are recommended ways to handle these lint rules, but also you can create your own set of lint rules too. One example is the lint project from Pascal Welsch. First, let's check what is provided to you by the Flutter team.
What Flutter Offers by Default
When you create a Flutter Project from scratch, see one important file called analysis_options.yaml.

If you open up the file you should see a bunch of texts explaining what this file does. You can ignore all the comments. We will explain everything related to that file soon.
If you remove all the comments on that file, you will have the following.
include: package:flutter_lints/flutter.yaml
linter:
  rules:
A brand new project comes with a package called flutter_lints. This package contains a recommended set of lints for Flutter apps, packages, and plugins to encourage good coding practices from the Flutter team.
The library is added by using in the pubspec.yaml file. Go to dev_dependencies section. You can see that flutter_lints added.

To update the default library, you can add the library to the pubspec.yaml file. For example imagine you are adding the lint library:

and update the analysis_options.yaml file to accommodate the new rules:

After this, your project will follow the lint rules from the new package.
Checking the Rules of the Lint Packages
The lint packages are nothing magical. They use yaml files to define the rules of the packages.
For example, if you go to the source code of the flutter_lints, you can see that it shows some of the rules that it provides.

You can see that it inherits some rules from the lints package and adds couple of new ones.
Let's see one of them in action. avoid_print which suggests using a logging framework. If you are using Flutter, you can use debugPrint or surround print calls with a check for kDebugMode.
If you update the main function in main.dart file like the following:
void main() {
  print('Flutter app is starting');
  runApp(const MyApp());
}
You can see that it will warn us to not use print.

It will even give you a suggestion to update the print call to help you.

If some rules are not preferred by you, you can exclude these in the analysis_options.yaml file.
include: package:flutter_lints/flutter.yaml

linter:
  rules:
     avoid_print: false
For example, in the example above the rule of avoiding the print is disabled for the project.

You can see the earlier example is not showing the warning underline.
List of Available Dart Lint Rules
The Dart team constantly develops lint rules. Some of them are experimental to see if they can be useful to the developers in the future, some of them already proven to be used and ready to be used on the production ready projects.
For checking the all list of rules, you can go to lint rules website.
Rules are split into three categories:
error
style
pub
Each lint rule has labels and informative texts that are indicating if the lints are experimental or deprecated.

You can see the information details about them in the description parts.
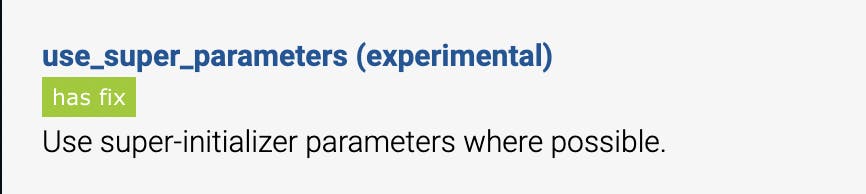

You can also see where they are used as well. It can be with core lints package, or flutter package.
Creating Your Own Lint Rule Implementation
You can see the full list of lint rules over here. This list is the base for lint packages that are shared so far. The community members or the teams decide what lint rules makes the most sense for them and create their own bundle of rules.
For using the rules, first thing you need to do is copy the rules from the list above. Open up the analysis_options.yaml file, delete everything and paste everything in it.
If you go to, main.dart file, you can see that it is completely yellow.

This is too noisy. Also, many of the rules that you added can contradict with eachother.
E.g. If you add final to the parameter of the build function. It will ask you to not use an unnecessary final in the function.
So you need to select the ones that would work for you and not against you. That is why people decided to create the libraries, to save the work that you might have for this.
One way we did in some projects was to comment out all rules and go one by one to enable them. This way, you are in control of what you are enabling and also be in control of any conflicts.
We can get rid of the noise in different ways. We can either remove some of the rules by deleting them or, mark them with booleans to mention that they are enabled or not.
linter:
  rules:
    avoid_print: false
    prefer_expression_function_bodies: true
You might realize that we do not have the list representation anymore. Due to YAML restrictions, you can’t mix list and key-value syntax in the same rules entry. You can, however, use the other syntax for rules in an included file.
We can also exclude the files that they are used. to partially enable or disable.
You should add analyzer keyword to customize analyzer and let the analyzer know to exclude a file or list of files
analyzer:
  exclude:
    - lib/main.dart
This will ignore the linter errors that you have for your project at the main.dart file.
You can also enable language features as well. For example, Dart is an optionally typed language but you can enable the strong types for Dart.
analyzer:
  language:
    strict-casts: true
    strict-inference: true
    strict-raw-types: true
strict-casts: type inference never implicitly casts from dynamic
strict-inference: type inference never chooses the dynamic type when it can’t determine a static type
strict-raw-types: type inference engine never chooses the dynamic type when it can’t determine a static type due to omitted type arguments
Summing Up
Now that you have an overview about what Dart Static Analysis is and how it works, be sure to follow it along and fix anything that it throws at you. The directions that it provides are not annoyances, they are your safety nets. If you think that a certain rule is not valuable to have in the project, you can ignore it at your own risk.
If you have any further questions, do not hesitate to reach out over Twitter or LinkedIn.